Editing & Saving
Edits are made in place, held as pending changes, and written to the database in one batch when you save. Nothing reaches the database until you click Save.
Open a cell
Three ways to start editing:
- Double-click the cell.
- Focus the cell and press Enter.
- Focus the cell and start typing. The first character replaces the old value.
The editors
Each data type gets its own editor.
| Type | Editor |
|---|---|
| Text, Integer, Decimal | An input box with a teal outline |
| Date | An input box with the column's own date mask applied as you type |
| Domain | A searchable list of the referenced records, shown as {CODE} Name. Type in Type to filter… to narrow it, arrow through the options, press Enter to pick one |
| Yes/No | A short list with —, the true label and the false label. The labels follow the column's display format |
To commit, press Enter, Tab, or click another cell. To cancel, press Escape.
Edited cells turn yellow and stay yellow until they are saved.
Save the batch
The header shows Save (N) with the number of pending changes. Click it, or press Ctrl+S (Cmd+S on Mac), to open the save dialog.
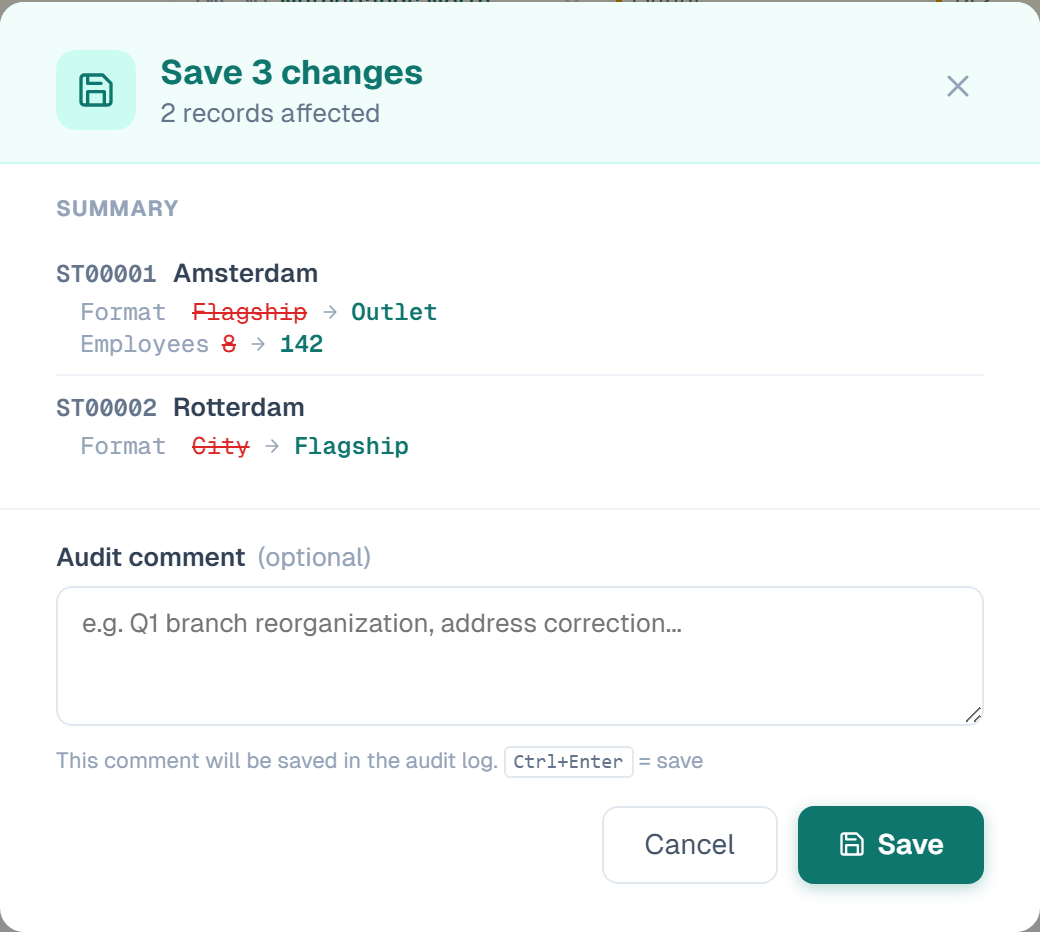
The dialog lists every change as *field, old value → new value*, and marks new records with a NEW badge. Domain values are shown by name, not by row id.
- Read the summary.
- Type an optional audit comment. It is stored with the change and shown in the audit panel.
- Press Ctrl+Enter, or click Save.
Press Escape to close the dialog without saving. Your pending changes stay.
Validation
Required fields
Every entity has two system fields that are always required:
- Code — the unique business identifier. When Auto-generate Code is on, the database assigns it and the cell is read-only
- Name — the display name of the record
Any custom attribute can be marked Required in the entity settings.
An empty required cell in a row you touched gets a red border, a light red background and the placeholder text Required. The markers clear as soon as you fill the field. A new row that is still completely empty is removed when you navigate away.
The save dialog checks every row
When you open the dialog it checks the whole dataset, not only the rows you changed. If a row is incomplete:
- The dialog header turns red and reads Cannot save
- A list names the rows and the missing fields
- The Save button is disabled until the rows are fixed
Duplicate codes
Codes must be unique within an entity. A duplicate gets a red border as soon as you leave the cell, the save dialog lists every clashing code, and saving is blocked. On an auto-code entity this cannot happen, because you never type a code.
The database checks too
usp_Data_SaveRow re-checks every required attribute. A save that bypasses the browser — a direct API call, for example — is still refused with a readable message.
Undo
Two buttons appear in the header as soon as you have unsaved changes, and they do different things. Both have a keyboard equivalent.
Step back one change. Click Undo, or press Ctrl+Z (Cmd+Z on Mac). Each press reverses one cell edit, one paste or one clear. The cell-level history holds the last 50 steps and is cleared when you save, switch entity, or discard.
Throw away everything. Click Discard all to drop every unsaved change on the screen and restore the original values. This is the same result as leaving the entity without saving.
Related
- Grid Overview — where the Save button lives
- Adding, Deleting & Pasting — new rows and clipboard work
- Audit Panel & Read-Only Fields — read the change history of a row
- Attributes & Data Types — required, unique and decimal settings
- Approval Workflows — what changes when an entity needs approval